Wednesday, July 21, 2010

The ABCs of HD Video on Your DSLR Camera


What a difference a decade makes!

In the last ten years, we’ve seen a mass exodus of photographers leaving film cameras for the many benefits digital technology has provided. The industry continues to progress, offering us a dizzying array of new features, accessories and ways of better leveraging the equipment we currently own. One of the most significant advancements is the ability to have a DSLR camera capable of shooting high quality video in low light conditions. This advancement opens doors in a variety of personal and professional applications.

To illustrate just how far we’ve come, the recent season finale of the television show House was shot entirely using the Canon 5D Mark II! The show’s director Greg Yaitanes states that he believes this is ‘the future,’ and we’re inclined to agree.

If you’re considering a new DSLR camera, here are a few reasons why you might consider getting one that has HD Video Capability:

Combination Convenience: Many people find they need to carry both a still camera and a video camera when they travel for vacation, special events or even attending simple functions such as a birthday party or anniversary bash. Having this combination allows us to consolidate the amount of equipment we need to care for and carry, and this benefit alone warrants serious consideration.

Depth of Field Benefits: Today’s DSLR cameras have an advantage over many of today’s current video cameras in that DSLR lenses have a greater DOF (depth of field) control than comparable video camera lenses. This is particularly beneficial for those instances where the photographer needs to convey a certain sense of distance or expansive space. Professionally shot films leverage a shallow depth of field, making the foreground sharp while keeping the background blurred. The HD DSLR cameras currently available provide greater flexibility and control over the DOF due to the ability to change lenses for different scenarios.

Using What You Already Own: One of the wonderful benefits of DSLR cameras is the ability to use lenses you already own on a new model DSLR body. If you’re considering a new HD DSLR camera, you may very well be able to use your existing lenses, which will allow you to further expand your options when experimenting with video.

More Potential Work for Working Photographers: Whether you make a part-time or full-time living as a professional photographer, the ability to shoot HD video opens countless new doors for you and your clients. Wedding photographers can now incorporate video clips of key moments in the ceremony and reception, commercial photographers can now assist with web-based promotion videos and related content, and school photographers can offer videos for schools looking to promote special events or looking for community support for fundraisers.

It’s important to note that learning to shoot high-quality video will take some time and experimentation—and learning to edit video is an additional skill you will need to study-- but it has never been a better time to consider this exciting new frontier. The technology that exists today would have cost tens of thousands of dollars just a few years ago. If you’re looking for a new way to expand your client offerings, this may be the perfect fit for you.

Aquatic Photography, Part II: Basics of Shooting Underwater

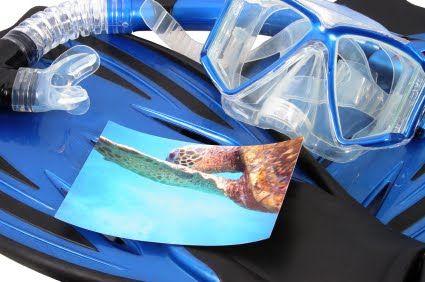
For many photographers, exploring what’s beneath the sea is a natural progression in a desire to expand their skills and experiment with new subjects. It’s important to understand what kind of aquatic photography is appealing to you so that the proper training is completed in advance. For example, there will be different challenges in shooting at 60 feet versus shooting just a few feet below the surface. The following advice refers to underwater photography while scuba-diving (as opposed to snorkeling). Here are a few basic considerations and concepts to help you get started in aquatic photography once you’ve received your scuba certification:

Neutral Buoyancy is Best: There’s never been a better time to be neutrally buoyant than when you’re trying to capture that ideal underwater moment. It’s best to hover without using your fins because, if you’re negatively buoyant, you’ll end up kicking up sand and related debris. Neutral buoyancy will also help you get closer to those shy fish and other nervous sea life. A calm diver in control is far more likely to experience success than one who is constantly adjusting and moving about.

Use Strobes to Compensate for Color Loss: As you dive deeper into the water, the sunlight wavelengths of red, orange, and yellow are the first to disappear, rendering images with a cool, flat appearance. In order to compensate for color loss, photographers find a flash or strobe critical to bringing back rich hues and textures in their images.

Get Close Whenever Possible: When it comes to shooting underwater subjects, fill the frame whenever possible. Shooting close and wide will allow you to capture your subject in a more intimate manner and having less water between the subject and camera. Many professional photographers recommend no more than three feet of water between the subject and the lens. This technique will also help your colors remain more vivid and textures more defined.

Patience over the Chase: Patience is a necessity when it comes to doing anything underwater, and it’s even more critical when you’re on the hunt for close-up shots of clownfish. Many novice photographers make the mistake of chasing after fish in an effort to grab a shot before returning to the surface. This method is highly ineffective as the fish are always faster. Patiently waiting for sea life to return may be a challenge but it is the best way to get the image you’ve imagined. There’s a difference between swimming towards a shot and hunting down your subject.

You’ll also need to make sure your dive buddy understands and is willing to be patient as well; the last thing you need is a frustrated dive partner swimming about and kicking up sand when you’re in the mode to wait it out for the shot. Make sure you’re on the same page when working on your initial dive plan so there are no misunderstandings.

Know Your Controls: Experienced divers realize that many of their actions must be instinctive as visibility is limited; they must be able to complete several tasks intuitively. This concept also extends to your camera controls. Make sure that you know where key controls are without having to hunt and double-check as you may end up missing a shot when fiddling with your camera. When shooting underwater, you’ll only need to adjust focus, exposure and your strobe settings. Don’t worry about anything else as you’ll also be managing maintaining neutral buoyancy and composing your shot. Everything else is just a distraction at this point.

If there’s one thing that is similar with both land and aquatic photography, it’s the importance of mastering the basics. You’ll find that your aquatic photography skills improve quickly if you’ve paid ample attention to your foundation.

Straps for Safety: Your camera strap is the first line of defense between your expensive gear and the pavement. Make sure your current strap is in good order and free from fraying and malfunction. We’ve got several high quality straps to help your camera stay secure and in your control.

Keeping it All Together: Professional photographers know that the ability to keep all their gear together and quickly accessible is critical to executing a successful event. One of the most useful tools for working photographers is also one of the most overlooked—the photojournalist vest. The PROMASTER Photographers Shooting Vest has 21 pockets, ranging in size from pen-sized to oversize. The vented back and mesh liner allow free movement of air around the body. The snap epaulets will keep your camera, binoculars, or tote bag straps on your shoulder. The vest includes a heavy-duty zipper that will close the entire front or any portion you wish. It also has a single snap closure for the front and two snap adjustments for the sides. And, our PROMASTER Photographers Shooting Vest is built oversized to accommodate fully-filled pockets.

What is Fast Glass? You may hear photographers tossing around the term ‘fast glass’ but aren’t sure what it means. The term ‘fast’ refers to a wider aperture, which lets in more light and because less light is needed, the shutter doesn’t need to be open as long.

WANTED!!!!


WANTED
Jeff Masure


Description: Usually Wears a Smile

CAUTION: Heavily Armed With Kindness…This Could Be Contagious!

PRIOR CONVICTION: Thoughtfulness and Generosity


Please Help Me!!! I have been arrested and will be put in jail for the Muscular Dystrophy Association (MDA) Lock-up. Don’t even bother asking what crime I have committed – it’s not really that important. I just have to raise my bail of $3,280 before the Lock-Up and they will go easy on me, but I need your financial assistance to post my bond. Please lend your support during the:
2010 Fort Worth Telethon Executive Lock-Up

Your 100% tax-deductible donation will help MDA continue research into the cause and the possible cure of the 43 neuromuscular diseases they cover. Your support of the MDA Lock-Up will also help MDA provide medical equipment, clinic visits, support groups and a magical week of MDA Summer Camp for the families served by the Association in our local area.

Sunday, July 18, 2010

Rental

Please note our Rental Policy has change:


  • Weekend rate starts at 4:00 p.m. on Friday and ends the following Monday at 11:00 a.m.

  • Pick-ups any time between 2:00 p.m. and 4:00 p.m. will be charged an additional half-day fee.

  • Any items picked up before 2:00 p.m. will be charge an additional full day.

TERMS AND CONDITIONS

FWC provides rental equipment as a service to the commercial photographic mark. It is assumed that the renter is proficient in the methods of photography, and lighting. Rental DO NOT includes training on equipment use or technique. Day rates are based on 24 hours. Weekend rates are billed at one-day rate when picked up between 4pm-6pm on Friday and returned by 11am Monday. For a full week rental you pay for a 4-day fee. A security deposit is required on all rentals. Insurance is the sole responsibility of the renter, and required. FWC inspects all equipment for damage upon return. Any damage or missing parts is the responsibility of the renter, and will be charged accordingly. For complete rental policy requirements, please ask for a copy. Rentals more than 4 days late with out notice, will be charged to the renter for the full price of the item(s) rented. A valid DL and Credit Card NOT Debit Card is required for all rentals. If you do not see something you may need, please call.

Our Supply of equipment available for rental is limited. We advise you to call and make your reservations today!


CAMERA BODIES


CANON


NIKON


LENSES


CANON FIXED FOCAL LENGTHS

CANON ZOOMS
NIKON FIXED FOCAL LENGTHS

NIKON ZOOMS


FLASHES AND EXTERNAL BATTERIES


TRIPODS


  • Bogen Tripod and Head . . . . . . . . . . . . . . . . . . . . . . .$15

  • Bogen Monopod . . . . . . . . . . . . . . . . . . . . . . . . . . . . .$5


LIGHTING


  • Elinchrome 400BX Set . . . . . . . . . . . . . . . . . . . . . . . . $50

  • PocketWizard Plus II Transceiver Set . . . . . . . . . . . . . .$15

STUDIO ACCESSORIES

  • 25lb Sand Bag . . . . . . . . . . . . . . . . . . . . . . . . . . . . . $5

  • 15lb Sand Bag. . . . . . . . . . . . . . . . . . . . . . . . . . . . . $5

  • 42in 5 in 1 Reflector Set . . . . . . . . . . . . . . . . . . . . . . $5

  • Background Stand Set (stands & Crossbar) . . . . . . . . . $15

  • 10x24 ft Backgrounds (Various Colors) . . . . . . . $25

DIGITAL PROJECTORS AND SCREENS


  • LCD Projector . . . . . . . . . . . . . . . . . . . . . . . . . . . . . .$100

  • 70x70 Dalite Projector Screen . . . . . . . .Free with Projector

Thursday, June 3, 2010

An Introduction to Aquatic Photography: Part I—Getting Scuba Certified


This summer we’re providing a three part series that will cover a number of aspects of underwater photography. Whether you just want to get better underwater shots of your kids in the pool, expand your abilities when snorkeling or become scuba certified in order to shoot fantastic tropical fish and reefs, we’ll explain how to make the most of every situation. In Part I, we’ll cover how to choose the right scuba instructor and dive shop in order to get certification, allowing you the opportunity to begin your underwater photography safari.

Scuba-diving is a sport that conjures up ideas of adventure and treasure-hunting. What many people don’t realize is that it’s also a sport that can be done regardless of being 21 or 61, and for those who’ve always wondered what it would be like to shoot underwater, getting scuba certified is an important required step in reaching that goal.

Scuba-diving can be a bit perplexing because, unlike other sports, there really isn’t a way to dabble in it to see if you like it. But there are ways to decide if this is something you’d like to pursue. If you’re intrigued or interested, here are a few tidbits to help you get started:

Find a Reputable Dive Shop: Get started by doing an online search to find a few dive shops or instructors in your area. Ask about the possible options for courses and the time and equipment commitment needed to get started. Also ask about their certification—the best-known associations are PADI (Professional Association of Diving Instructors) and NAUI (National Association of Underwater Instructors). Inquire about the qualifications of their instructors and about their safety record. And ask what kind of money-back guarantee they have in case an emergency comes up and you’re unable to go through with the entire course.

Don’t Be Shy: If you have any questions, please ask them. Many people who worry they may not be able to learn to scuba-dive are pleased to find once they begin that they’ve discovered a passion for a new sport. There are a few considerations to ponder. For example, if you’re age 40 or over, you’ll need to have a physical first to ensure good health, and those with specific respiratory issues such as asthma will need to first check with their primary physician before continuing.

Get a Buddy: Scuba-diving is considered a social sport and having a friend with you in the class can help in a number of ways. You’ll learn various skills that require two people and you’ll also need a dive buddy whenever you go out after certification, so why not find a friend to join you? If you’re unable to find someone to take the course with you, the instructor will pair you up with someone, giving you an opportunity to make a new friend or two!

Find the Right Fit: Your relationship with your scuba instructor is very important so make sure you find someone with whom you feel comfortable learning. If you find that you’re having trouble relating to an instructor, politely inquire about other classes or options. Professional instructors shouldn’t be offended as they understand that there are some situations where a different instructor is a better fit for a particular client.

It’s important to note that the quality of the photographs you shoot will depend largely upon your skills underwater and how well you handle issues of mastering neutral buoyancy and related diving skills. Once you’ve received your scuba certification, you’ll then be in a position to begin your underwater photography adventures and can even enroll in an underwater photography course.

Thursday, May 27, 2010

Could LED Lights Be Best for Your Needs?

If you’ve heard the term ‘LED light’ but aren’t sure what it really means or why you should consider using it in your photography, let us shed a little light on the situation!

LED stands for Light Emitting Diode. This particular kind of light is often used in other arenas, particularly in automotive lighting. Some recent technological developments have made this lighting source an excellent fit for photographic uses as LED lights can give off as much white light as other standard light sources.

LED lights are able to provide a uniform lighting source because the light is clustered in such a way to provide a streamlined beam of illumination. LEDs are very compact and there are no concerns of tubes or filaments breaking, which can greatly complicate a photo shoot. They’re also extremely energy efficient. Another bonus? Because LED lights don’t emit heat, there is little risk of this form of lighting causing or contributing to a fire. And they can save money because they last significantly longer than conventional lighting sources—up to 100 times as long!

When it comes to your photography, you’ll be able to achieve better natural-looking lighting by using a high quality LED light such as some models from our PROMASTER series. These lights are also the perfect accessory to use for your video projects. Here are a few choices to consider, and we have models which be used on-camera or as part of a studio lighting setup. www.fortwortcamera.com

Pick the Perfect Gear Bag


While many of us are guilty of tossing our digital cameras and equipment inside a large tote or backpack, deep down we know that we should be taking better care of our gear. The right bag provides a number of benefits including proper padding to absorb shock and to protect from bumps and drops, and keeping all your accessories and chargers in one place so they aren’t lost before your next trip. There are so many designs to choose from, and it can get a bit overwhelming at times, so let us help you narrow your focus. Here are a few tips to help you find the right gear bag for your needs:

Consider Your Gear: Take a quick mental inventory of your equipment. Do you use a point-and-shoot camera or do you switch between a point-and-shoot and your DSLR depending on the situation? How many lenses do you have? Are there accessories that you own that you often forget to bring with you such as filters, flashes or lens cleaner? How often will you need your laptop with you during a shoot or travel? Do you want to keep everything streamlined—including your laptop-- in one bag or do you have a laptop bag you already use for this purpose? Thinking about all your items as a group will help you get a better idea of which bags will make the cut.

Include Room to Grow: If you’re like many photo enthusiasts, you’ve got a wish list of accessories and other items you’d like to own one day. While there’s no reason to purchase a bag that far exceeds your current needs, ponder getting a slightly larger size if you are considering additional purchases of equipment this year.

What’s Your Style? It’s important to consider your preferences when choosing a bag. Some people find that a backpack style is the perfect design when needing to carry a substantial amount of gear comfortably while others prefer a messenger style designed to lay flat on the hip and that distributes weight off the shoulder. Still others would prefer something that blends into a work environment and looks more like a traditional briefcase.

How Will You Use Your Bag? Will your camera bag often be considered a carry-on for airline travel or do you need something capable of handling additional items when out hiking or outdoors? Do you need a smaller model that lets you travel light? Or, is it best to have a rolling hard case to help you navigate train and airport terminals?

When it comes to keeping your gear protected and organized, the right bag can make all the difference. We’ve got a number of different styles for you to consider ranging from small messengers to full-sized carryalls: www.fortworthcamera.com

Tuesday, April 6, 2010

April Showers Bring May Flowers…


While it’s true the month of April is known for the rain it brings, the wet weather is often an under appreciated opportunity to take pictures. While you certainly don’t want to be standing in the pouring rain with your best shooting gear exposed, that doesn’t mean you have to wait until everything is bone dry, either. If you can spot a body of water such as a pond river, you can capture reflections and rain patters forming on the surface. You may want to leave your shutter open for a bit longer in order to catching the falling raindrops. Once the rain has ended, opportunities to capture rain-kissed leaves, flowers and other subjects will be all around you. Just make sure to pack plastic bags and a towel or two to protect your equipment!

The Importance of Great eBay Photos:


The Importance of Great eBay Photos: Successful eBay sellers understand the importance of taking high quality photographs as a tool in closing the deal. If you’re currently selling online—whether as a way to turn some of your old things into cash or as a side business designed to bring in another stream of income, you’ll want to make sure your images demonstrate the value of the item you’re selling. Did you know that we can help you set up a table-top photo studio designed to help you get high quality pictures without breaking your budget or taking up a lot of space? We can also give you a few tips on how to best photograph reflective items such as jewelry, chrome or other challenging subjects. Just stop by our store so we can make sure you get just the right setup for your particular needs.

Quick Tips for Shooting Spring Sports


Spring has sprung and we are finally enjoying some warmer weather. It’s also time for spring sports, which means ample opportunities for getting great pictures. Here are a few tips to get you in the swing for spring:
Scout Your Spot Early: Figuring out where to stand is critical to getting the best shots because success means being in the right place at the right time. Try to get to the field a bit early to gauge which places are best for shooting the action as it unfolds. Is it possible to get a spot close to first base? Are there items that could obstruct your view? As you start shooting in this environment, you’ll get a feel for the best places to stand, and once you’ve got that down, you should be set for the entire season.
Getting Around the Fence: How many times has the fence proved a formidable opponent to your getting that perfect shot of your child sliding into home plate? Again, a little bit of planning can make all the difference. Play with various locations close to the fence to see if there is a particular angle that will allow you to shoot in the clear. You may also want to consider a monopod for these events as they can be a great asset in helping you shoot from a higher angle, which will not only allow you to secure the shot but also to create images from a new and interesting perspective. Want to learn more about our monopods?
Candid Camaraderie: Sometimes we’re so focused on the action that we forget about those wonderful moments of playful connection and camaraderie between teammates. Keep your eyes open for those high-fives and pats-on-the-back. These moments represent the heart of team sports and lend another dimension to our sports photography library

Wednesday, March 24, 2010

Scott Smith Lighting Seminar

September 10 - 12, 2010
November 12 - 14, 2010

Master of Photography, Scott Smith, will be training photographers to see the light in plain, easy to understand terms. No matter your experience, Scott will teach you how to take control of your lights and how to pose for better portraits. Visit his website for more information.


1-800-853-1190


Tuesday, March 2, 2010

Photographing Pets

For many people, pets are an important part of the family.  They provide companionship, affection, protection and a healthy dose of laughter.  However, capturing your pet’s personality—or even getting him to sit still—can be a real challenge, but with a few tricks up your sleeve, you’ll find that photo that truly captures your furry friend’s fun disposition. 

Keep it Natural:  When it comes to lighting, try to shoot using available light even if you’re indoors.  Perhaps you can use the light coming in from a nearby window.  If possible, forgo using your camera’s flash.  In addition to possibly startling your pet and hindering his cooperation, the flash can also keep you from capturing your pet’s coat color accurately. However, if your pet has an all-black coat, a flash or direct outdoor sunlight can be an advantage because it will help bring out subtle shadings and variations that make your pet unique.

Follow Your Pet:  When it comes to posing your pet, it’s best to meet him where he is at that moment.  If he’s resting, consider taking a few shots from a distance first.  Move in slowly and deliberately.

Frame Shots Tight:  When it comes to taking pictures of pets, a great zoom lens can work wonders. Whenever possible, fill the frame with your shot and shoot a bit tighter than you’re used to as it will create a more intimate and personal pet portrait.  If you’re looking for a new lens, we have a number of PROMASTER models designed to deliver high quality at a competitive price:  http://www.promaster.com/digital

Include Your Kids:  If you have children, this is a wonderful family project and a great way to spend time after school one afternoon.   Enlist your child to help with posing and using toys or other enticements to get your pet to look in a certain direction or to create an ‘action’ shot of him retrieving a toy.  You can capture some great interaction between your kids and your pet; just let the events unfold and shoot away.  Trying to control the interaction may end up stifling the images and losing the lightness you’d hoped to capture.

Let it Go:  Photographing pets can be challenging at times, and if your pet isn’t cooperating, put the camera away and try another time.  After a nice long walk or a game of catch, your pet may feel more cooperative and you can try again.

Monday, March 1, 2010

Spring Break Photography Tips

You can almost hear the squeals of glee coming from kids and adults alike when Spring Break arrives.  After plodding through winter weather, school, work and family commitments, the promise of a few days of freedom is enough to boost anyone’s spirits.  If you’re one of those lucky souls with a getaway planned during Spring Break week, here are a few tips to help you prepare to return with some fantastic photographs:

Pack the Right Gear:  Make sure you’ve got the right equipment for your trip.  If you want to travel light, you may find it best to choose your compact camera in lieu of your DSLR; however, if your destination includes some amazing scenery and landscapes, you may find it’s well worth taking your DSLR to ensure you are prepared to capture the grandeur of your location.  And remember to pack the battery charger, a lens cleaning cloth and an extra memory card.  It will only take a few minutes to properly prepare and it will be time very well spent.  If you need to pick up a memory card for your trip, we carry some of the best on the market:  http://www.promaster.com/memory

See the Signs:  While on your travels, make sure to photograph any interesting signs that display the uniqueness for your location.  Clever street names, signs displaying unusual warnings (Javalina crossings, anyone?) and mile markers can add a very local and interesting element to your vacation library of photographs. 

Define the Essence:  Each location has its own personality, its own attributes and distinctive markers.  While on vacation, think about what words you’d use to describe your vacation spot.  Having that clarity will help you with your storytelling and assist in identifying those sights that articulate your vision.

A New Twist on Famous Landmarks:   If you’re traveling to a well-known landmark, park or destination, take the opportunity to photograph it in a new and interesting way.  Look at corresponding architecture, foliage and surroundings to see how to take a familiar sight and uncover a new way of viewing it.  Experiment with zoom, distance, angle and lighting to unearth an interesting new perspective.  

Thursday, February 4, 2010

Why a Photography Hobby is Good for Women’s Health

Today’s women find themselves with more tasks than time and juggling multiple roles that each have a long to-do list attached. For those ladies who say they don’t have the time to explore their love of photography, we’d like to share some good news. It turns out that a photography hobby can improve your health.

Dr. Elizabeth Weidmer-Mikhail, director of the women’s psychiatry program at the Texas Health Presbyterian Hospital in Dallas, stresses the importance of actively engaging in a hobby to deal with the tangible physical and emotional stresses that women manage during days filled with caring for others.

"Women need to do things that are soul-feeding that aren’t aimed at gratifying others,” Weidmer-Mikhail said. "Women need to take care of things, to do things that promote emotional growth. Find a satisfying hobby that doesn’t involve making money or drawing attention to yourself. It will increase your sense of self-worth, which leads to better health all around.”

Many medical professionals point to the benefits of a hobby to help with stress-reduction and related ailments. Photography is a wonderful choice because of the flexibility, low-cost of entry and creativity that can be explored.

So, the next time we send you an announcement about an upcoming event or workshop and you automatically think, “I wish I could go but I just can’t get away,” please reconsider. You do so much for those around you, and by enjoying your photography hobby and making time for yourself; you will also benefit your loved ones.

Wednesday, February 3, 2010

Rainy Day, Be Prepared!


  • Two great styles to protect your gear in any configuration
  • Designed for handheld use or tripod application
  • Unique eyepiece opening adapts to most viewfinders for viewing through the lens— not plastic!
  • Camera and lens controls are easily visible and operable through the RAINSLEEVE™.-$6.99
  • The RAINSLEEVE™– FLASH version has an extra area to protect the flash unit -$8.99
  • Drawstring lens opening offers easy access and a snug fit
  • Includes two per package

Monday, January 4, 2010

Turning Your Photography Hobby into a Business

Many a business guru will attest to the importance of following your passions when it comes to starting a business.  If you love photography and have entertained the notion of turning your hobby into a side business, here are a few tips:

What is Your Specialty?  Are you interested in shooting weddings, seniors or other portrait-related venues?  Are you hoping to expand into commercial photography for real estate developers and similar interests? While you may want to do all of it, consider specializing in one niche arena until you have built up a reputation and client list.  You can expand into new areas once you get your footing.  

Get Notable:  You’ll want to start brainstorming in a notebook to explore you ideas and possible obstacles to getting your business off the ground.  Keep it with you and write down ideas as inspiration strikes.  The written process can also help you uncover new avenues that may not reveal themselves otherwise.

Start Local:  Think about who might be in need of your services? Many small businesses have digital cameras but not the discerning eye to create a compelling image for their brochures, websites and sales materials. 

Sharpen Your Business Skills:  A thriving photography business is as much about powerful marketing as it is about high quality photography.  If you don’t feel you have the marketing and promotion savvy needed, enlist a partner or someone who can assist you in building the ‘business’ part of your new venture. 

Be Social:  Let your Facebook friends and Twitter followers know that you’re now open for business.  You never know where a new lead will come from, and your friends may help you spread the word about your new gig. 

Stop in Our Store:  We’d love to help you with your new venture.  Let us help you determine if you need any additional equipment or evaluate the camera and accessories you already own.  For example, we have a wide range of high quality studio lighting. 

http://www.promaster.com/lighting

 Maybe we can help you spread the word as well! 

Monday, December 28, 2009

Give Your Photos a Fresh Start

With the end of the holiday season comes a new year and the promise of a fresh start.  Now’s the perfect time to consider a few new resolutions when it comes to your favorite photographs, but don’t worry—none of these recommendations include a treadmill or dessert bans! These three steps will have you organized and backed up in no time flat.  Just pick one half hour once a week and you’ll be amazed at how well-sorted your photo library becomes!

Out With the Old:  Did you know that the average person has about 1,500 digital photographs on her computer?  Sometimes the mediocre pics crowd out the truly stellar ones, and too many random images can clutter your collection as well as your hard drive.  All you need is a half-hour in front of the computer to sort through your photographs.  Delete the blurred images, the duplicate photos and pictures of old acquaintances with whom you no longer stay connected.

For those who take photographs for school or fundraiser events, now is the time to copy the images to CD/DVD and deliver them to the proper people.  Your hard drive will thank you and you’ll feel better knowing they made it into the right hands.

Find Your Favorites:  Many photo organizing software programs have a function that lets you mark your favorites so you can find them for the next slide show, gift, or scrapbook project.  It only takes a little time to scan through your pictures to find your favorites and tag them accordingly.  You can then easily select those favorites and copy them to CD/DVD to send to loved ones or relatives.

Hard-Copy Back-Up Made Easy:  Now that you’ve deleted the old photos, marked and organized them, take one of the CDs that you made and bring it to our shop for 4x6 prints.  Viewing photos on the computer is fine but nothing compares to the experience of holding a printed photograph in your hand.  Plus, a printed-picture is the perfect back-up solution as paper doesn’t crash! Better yet, make two copies—one to keep and one to share.


Friday, October 30, 2009

Meet Emma.

Well if you guys remember a while back we where asking for suggestions and recommendations on who should be the new face to represent FWC.... (Old Blog Post) and the majority agreed!

Meet Emma, she is a 5-year-old female Weimaraner.

Qualifications:  She is great with people, easy going, great listener, plays well with others, likes children, she is patient, and respects boundaries. All thou we find out she likes to express her verbally to people who wear hats.

Hrs of availability: All day Wednesdays

Her Duties: Is to save you money!

For the moment Emma is staying home recovering from her spaying surgery. Thanks to Dr. Spikes and the staff at A-Animal Clinic, Emma's recovery is coming along smoothly.
Please keep and eye for "Emma is in the House" savings. Savings will vary week by week and it will happen only when Emma is in, so don't miss out.

Friday, August 28, 2009

Telling Your Story

Telling Your Story: How to Create a Powerful Photo Essay 


Photography has long been considered a powerful storytelling medium, and the photo essay is simply a more deliberate method of telling a particular story or chronicling a certain event.   Photojournalists such as Lauren Greenfield and Deanne Fitzmaurice have captured our imaginations and touched us through powerful photo narrative, and with today’s digital technology and a few storytelling techniques, you can begin experimenting with your own photo essays. 

Here are a few tips to help you get started:

·       Clearly Define Your Story:  It can be as simple as the first day or school or something more complex such as a controversial topic or current event.  Whatever the case may be, make sure you can clearly define it and explain it in one or two sentences.  The clarity gleaned from this exercise will help guide you throughout the process.

·       Go a Little Deeper:  Consider what aspects of the story you wish to convey.  Is it the wonder of seeing a natural wonder for the first time? The excitement of playing in a first little league game? Spend a little time contemplating the topic as you may uncover other aspects of the event to explore.

·       Plan Your Images in Advance:  It doesn’t have to be exact, but think about each photograph as a paragraph or chapter of your story.  How many images you take is up to you as each story is unique.  You may find that ten images portray the event as you wish while others may take fifteen or twenty.  There is no right or wrong number;  just make sure that each photo serves a particular purpose and plays a role in moving the story forward.

·       Consider How to Share Your Story: Continue to play with your creativity by enlarging the photos and having them mounted or framed as a series. We’d be happy to help you put the final polish on your photo essay. The completed result can become a wonderful conversation piece hanging in your living room or even in a local community center or art gallery!  

Monday, August 3, 2009

Taking It All In:

Your Guide to Fantastic Panoramic Photographs

Summer vacations often include locations with amazing outdoor scenery and stunning landscapes.  The desire to shoot panoramic photographs once meant investing in expensive equipment, but digital photography advancements mean that you can create picturesque panoramic s with your existing camera and computer. If you’ve hit the road in search of the great outdoors, make sure your images do Mother Nature justice.

Get in the Mode:  Check your camera to see if you have a panoramic mode.  If you aren’t sure, thumb through the menu or the manual to find out.  The panoramic mode is designed to help stabilize lighting conditions between photos in the series, and it will not change exposures between pictures as it would in automatic mode. 

Learn to Stitch:  Most of today’s image editing programs have a stitching tool that is designed to create a panoramic image from multiple pictures.  You may also be able to find a free software plug-in specifically for this purpose.  Check online for the options available.  You should be able to get what you need at no cost.

Stand Strong: Make sure to stand in the same position throughout shooting your series of images.  A slight adjustment of your location can result in photographs that don’t properly line up during the stitching process.   A quality tripod can help you retain your position while also keeping your camera stable. We offer a number of quality models here: http://www.promaster.com/products/tripods

Be Open to Overlap:  Make sure to leave some overlap on each image so that the photos can be properly combined.  When shooting the subsequent image, consider a 15-30% overlap of scene from the previous one.

Keep it Clean:  Nothing can ruin a fantastic panoramic picture like a finger smudge or dirt spec on your camera’s lens.  Keep a lens cleaning solution and cloth in your camera bag.  Many vacation photos have been ruined due to smudges and dirt, so a little preparation really pays off. http://www.promaster.com/products/cleaning


Try it Vertical:  Shooting a waterfall or other vertical wonder of nature requires the same basic principles as shooting a traditional horizontal panoramic.  Feel free to play with the images until you get the feel for shooting vertically.  You may find that the vertical element gives an additional creative twist to your panoramic photography!