
Thursday, September 30, 2010


Thursday, September 23, 2010
Saturday, September 18, 2010
Westcott Modern Vintage for a 3rd of the price.
 Could not wait to tell you all about this new Modern Vintage Backgrounds by Westcott. I know what you are thinking, "oh yea, I seen them before", well true, but not for this under $100.00.
We have them IN STOCK NOW in 6 different color patterns and designs.
Friday, September 17, 2010
Wednesday, September 8, 2010
Let Your Summer Memories Follow You Into Fall…

Create a Summer Scrapbook—the Easy Way: Take a few minutes to search through your summer shots and tag your favorites (many popular image editing programs have a function that allows you to do this). Copy the images to CD or onto a flash drive and bring them into our store. We can show you how to create a great scrapbook in no time flat. Consider making an extra copy or two to share with your kids or loved ones; there’s something special about holding a book of your favorite images in your hand. We love seeing them on the screen but nothing compares to the printed version.
Get Framed: Have you often thought about enlarging and framing some of your favorite images but just never seemed to get around to it? Let us do the heavy lifting for you! Just bring your images into the store and we’ll show you all the amazing ways that we can bring your summer shots to life. Imagine that incredible memory hanging on your wall in a place where you can enjoy it each day. And think of all the great conversations that image can encourage…
Make Note of It: Email is wonderful for casual communications but the art of handwriting a card to someone remains highly valued—especially by the person who receives it! Bring in one of your favorite summer photos and let us turn it into a personalized note card set. Now, the next time you feel like dropping a line, you can share a summer memory, too!
Lunch Kit Surprises: Order a 4x6 set of your favorite summer photographs and tuck them into your kids’ lunchboxes now and then. Kids love surprises and photographs are an easy way to give your kids comfort and support as they transition back into a busy school year.
Did you know that you could create one or all of these fantastic keepsakes just by bringing your images into the store? Come on in and get started!
Inside the Life of an Aquatic Photographer
 Alan Wulfe is seen by many as an underwater adventurer who spends his free time exploring the deep and filming a world few are fortunate enough to witness with their own eyes. His day job as the SVP of Alamo Aircraft LTD in San Antonio keeps him busy but he has made sure to make room for his aquatic photography passion. While he started with standard underwater photography, he quickly added video to his repertoire and has found combining the two mediums has taken his storytelling skills to an entirely new level.
 For more than 35 years, Alan has pursued his passion for traveling in pursuit of aquatic discoveries. Alan is a dive instructor and his enthusiasm has spread throughout his family. “My wife and all four of my children have their open water certifications,” he says. He has also been generous in sharing his discoveries with his community.
“I regularly share my work with some middle school and high school science classes in Austin and San Antonio,” Alan says. “They enjoy seeing aquatic life and the videos help them learn in a fun and interactive way.” In addition, Alan’s videos are used as teaching aides for Texas State University’s underwater photography course.
Alan’s unique perspective is one that he’s happy to share with other shutterbugs who are just venturing into aquatic photography. When asked what are some of the most common missteps beginning photographers make when venturing into the ocean, he says, “One of the most common mistakes people make when starting is to buy the under $50.00 camera. I currently use a “Lights n Motion” housing and video lights with a Sony HD Video Camera for both video and still shots, but I have used Nikons, Sea & Sea and Sea Life for stills.”
When it comes to technique, Alan advises, “Another common mistake is not understanding how color is lost when light is diminished as you go deeper or further away from your subject. Shooting down on a subject gives poor results while a straight on or up shot with the sun or flash at the right angle will yield better results. Try to “fin in and zoom out” the “less zoom the better the shot”. Backscatter can easily ruin a great shot.”
Alan has had numerous excursions in fascinating places, so it was tough to pin him down on a favorite location. After careful consideration, he offers, “I’ve had many great adventures starting in the 70’s so it’s hard to pick a few, but Truk Lagoon was incredible because of the history still available underwater and Palau had unbelievable corals and sea life. Little Cayman is always a favorite because it is easy to get to and the diving is always great.” When asked if he has another adventure on the books, he says, “Our next trip is on a live aboard in the Maldives later this year and Fiji in 2011.”
Alan also encourages anyone who has been interested in aquatic photography to get scuba-certified. “It’s never too late to start and what you see underwater will amaze you.”
Can the iPad be Your Camera’s New Assistant?

Can the iPad be Your Camera’s New Assistant? While the iPad has received enormous media coverage regarding its role in the future of computing, the debate also includes its impact on digital photography and how we interact with our photographs. It’s still too early to say what the long term effects will be, but we have discovered a few ways your iPad can help keep you organized and streamlined.
Travel Lighter: If an upcoming business or personal trip only requires light computing, the iPad can help you lighten your technology load. Its design can also get you through airport security more quickly as it doesn’t need to be taken out of your bag and scanned separately.
Photo Back-Up in a Pinch: By adding an iPad Camera Connection Kit (purchased separately), you’ll now be able to copy the digital pictures from your SD camera card to the iPad. The import happens quite cleanly in iPad’s Photos application but don’t expect to create extensive albums or do much organization at this point. That said, having your digital photographs on a second device can provide peace of mind. Don’t delete the images off your card until you can get them to your primary computer, though; it’s best to keep them on the card until you can properly transfer and organize them on your central storage computer.
Share This: The iPad’s screen design is an excellent platform for sharing and viewing digital photographs—far superior to viewing images on your cell phone. Many of us enjoy keeping favorite memories on our laptops to enjoy at our leisure, and the iPad makes this even more engaging. You can also keep your Facebook page current by uploading images from your iPad or emailing favorite shots to family and friends.
For professionals looking to share their work, the iPad can serve as a digital sample book or portfolio. It will be a great conversation starter as well as a new way of displaying your best work.
While the iPad isn’t in a position to replace your laptop and image editing software, it can provide some support with some of the most common digital camera issues. And for those who travel regularly for work or pleasure, your back will be pleased with the lightened travel gear.
iPad Photo Apps to Consider:
· Photo Transfer App
· CameraBag for iPad
· Photogene for iPad
· Filterstorm
· Masque
Thursday, August 26, 2010
Fort Worth Institute of Photography: Classes on the works
Here are only some of the topics that we are working on:
HDR Photography
Photoshop Elements - Beginner
Photoshop Elements - Intermediate
Nikon Capture NX - Beginners
iPhoto Software - Beginners
iPhone Imaging - Beginners
Studio Lighting - Beginners
Indoor Sports - Gymnastics
RAW File Conversion
Event Photography
Close-Up (macro) Photography
Baseball (Sports/Action) Photography
Zoo Workshop
AAA Travel focus - Beginners
AAA Cruise focus - Beginners
AAA Disney focus -Beginners
Canon DSLR - Beginner
Canon DSLR - Intermediate
Nikon DSLR - Beginner
Nikon DSLR - Intermediate
DSLR Flash Beginner
Tuesday, August 17, 2010


Wednesday, August 4, 2010
Tips for Traveling Light with Photo Gear
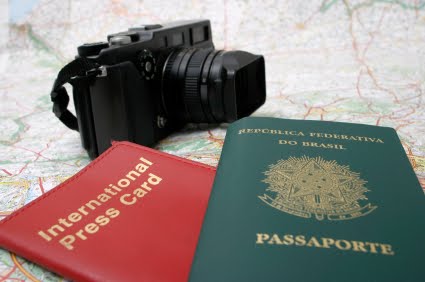
Whether it’s a weekend getaway or a two-week trek across the pond, packing right—and light—is critical to making your trek a success. After all, who wants to lug a bunch of superfluous gear around? Here are a few tips to ensure your gear bag is light, well-equipped and ready to travel:
Think it Through: Imagine your trip for a moment. Think about where you’ll be traveling. Do you need to take your DSLR with you or will your compact camera suffice? Do you really need that extra lens or can you do without it? Making a mental checklist of your itinerary can help you decide which items you need and which can be left at home.
Remember the Essentials: Make sure to pack a lens cleaning kit, extra batteries, your charger and extra storage media. These items alone will help you combat the majority of issues that might occur while you’re on holiday.
Offloading for Longer Trips: If you’re traveling with your laptop, consider offloading your digital pictures on a regular basis. This technique can serve as protection in case your media card is somehow damaged or fails during your trip. Here’s another great solution—take your card to the local photo retailer and print a set or two before your return trip home. You’ll have one less item on your to-do list and your family will enjoy looking at the photos and reminiscing on the return trip. You can even use the pictures as a mini-scrapbooking project to keep the kids entertained while you travel.
Keep Everything Charged: Dead batteries mean an instant end to picture-taking fun and a battery that dies while you’re shooting might even corrupt your digital camera card. Fortunately, we’ve got a great solution! The PROMASTER GO! Charger is a compact multi-function charger that can charge your DSLR batteries and also serve as a charger or power source for your cell phone or music player.
Tuesday, August 3, 2010
The One Thing Summer Campers Need to Pack:

Consider our new Infinity EL•X 8x42 ED Binoculars. PROMASTER uses only the finest optical glass in the Infinity EL•X series. Coatings make all of the difference when you want a bright crisp image and PROMASTER has spared no expense here. These glasses feature PROMASTER's EXCLUSIVE TRANSBRIGHT™ 99.3% light transmission coatings for the ultimate in bright, crisp images as well as PROMASTER's EXCLUSIVE REPELLAMAX™ element repellent coatings that aid in keeping your optics free from dust and other environmental elements to ensure you get the maximum viewing enjoyment and capability from your binoculars
Photographing Wild Horses

Photographing wild horses can be an amazing experience—the subject matter is compelling, beautiful and often unpredictable. You don’t need to be an accredited professional photographer to take on such a feat, but you do need to make sure you’ve got a few important facts in your knowledge toolbox. If you’re close to an area where wild horses roam or are planning a travel adventure to a particular location for this purpose, here are just a few things to keep in mind:
Bring a Good Zoom Lens…and a Tripod: It will take a bit of time and patience to get close enough to wild horses to photograph them, so a high-quality zoom lens will quickly become an important ally in making sure you can get close without intruding. The tripod will be important for stability and ensuring your images are as sharp as possible, especially when you’re photographing horses on the move.
Stay on the Traveled Path: Don’t venture off the main roads when traveling to the roaming grounds. Some areas can be damaged from tire tracks and vehicles, and that damage can take many years to repair. While we love the idea of traveling off the beaten path, this isn’t the time to do it.
Your Car is an Asset: Not only will it get you to and from your destination; your car can be the ideal place from which to shoot. Wild horses are often more used to seeing vehicles than people, and this can be a benefit because your car may help you get closer to the horses than you would be able to on foot. Make sure to move slowly and with caution and keep noise to an absolute minimum.
Take Your Time and Find Cover: Once you leave your car, you’ll want to walk slowly and find areas where you can crouch down low or remain behind cover such as trees, large rocks or other objects. Horses aren’t known to have exceptional eyesight but they can be easily startled so patience in your journey closer to them is important. You may also want to wear camouflage clothing to help you blend into your environment.
Aerial Photography Fun Fact:

Did you know that the French photographer and balloonist Gaspard-Félix Tournachon, who was also known simply as Nadar, was the first to practice aerial photography over Paris, France in 1858? From his initial creativity came a flood of new techniques to capture a birds-eye view of the world below.
Wednesday, July 21, 2010
The ABCs of HD Video on Your DSLR Camera

What a difference a decade makes!
In the last ten years, we’ve seen a mass exodus of photographers leaving film cameras for the many benefits digital technology has provided. The industry continues to progress, offering us a dizzying array of new features, accessories and ways of better leveraging the equipment we currently own. One of the most significant advancements is the ability to have a DSLR camera capable of shooting high quality video in low light conditions. This advancement opens doors in a variety of personal and professional applications.
To illustrate just how far we’ve come, the recent season finale of the television show House was shot entirely using the Canon 5D Mark II! The show’s director Greg Yaitanes states that he believes this is ‘the future,’ and we’re inclined to agree.
If you’re considering a new DSLR camera, here are a few reasons why you might consider getting one that has HD Video Capability:
Combination Convenience: Many people find they need to carry both a still camera and a video camera when they travel for vacation, special events or even attending simple functions such as a birthday party or anniversary bash. Having this combination allows us to consolidate the amount of equipment we need to care for and carry, and this benefit alone warrants serious consideration.
Depth of Field Benefits: Today’s DSLR cameras have an advantage over many of today’s current video cameras in that DSLR lenses have a greater DOF (depth of field) control than comparable video camera lenses. This is particularly beneficial for those instances where the photographer needs to convey a certain sense of distance or expansive space. Professionally shot films leverage a shallow depth of field, making the foreground sharp while keeping the background blurred. The HD DSLR cameras currently available provide greater flexibility and control over the DOF due to the ability to change lenses for different scenarios.
Using What You Already Own: One of the wonderful benefits of DSLR cameras is the ability to use lenses you already own on a new model DSLR body. If you’re considering a new HD DSLR camera, you may very well be able to use your existing lenses, which will allow you to further expand your options when experimenting with video.
More Potential Work for Working Photographers: Whether you make a part-time or full-time living as a professional photographer, the ability to shoot HD video opens countless new doors for you and your clients. Wedding photographers can now incorporate video clips of key moments in the ceremony and reception, commercial photographers can now assist with web-based promotion videos and related content, and school photographers can offer videos for schools looking to promote special events or looking for community support for fundraisers.
It’s important to note that learning to shoot high-quality video will take some time and experimentation—and learning to edit video is an additional skill you will need to study-- but it has never been a better time to consider this exciting new frontier. The technology that exists today would have cost tens of thousands of dollars just a few years ago. If you’re looking for a new way to expand your client offerings, this may be the perfect fit for you.
Aquatic Photography, Part II: Basics of Shooting Underwater

For many photographers, exploring what’s beneath the sea is a natural progression in a desire to expand their skills and experiment with new subjects. It’s important to understand what kind of aquatic photography is appealing to you so that the proper training is completed in advance. For example, there will be different challenges in shooting at 60 feet versus shooting just a few feet below the surface. The following advice refers to underwater photography while scuba-diving (as opposed to snorkeling). Here are a few basic considerations and concepts to help you get started in aquatic photography once you’ve received your scuba certification:
Neutral Buoyancy is Best: There’s never been a better time to be neutrally buoyant than when you’re trying to capture that ideal underwater moment. It’s best to hover without using your fins because, if you’re negatively buoyant, you’ll end up kicking up sand and related debris. Neutral buoyancy will also help you get closer to those shy fish and other nervous sea life. A calm diver in control is far more likely to experience success than one who is constantly adjusting and moving about.
Use Strobes to Compensate for Color Loss: As you dive deeper into the water, the sunlight wavelengths of red, orange, and yellow are the first to disappear, rendering images with a cool, flat appearance. In order to compensate for color loss, photographers find a flash or strobe critical to bringing back rich hues and textures in their images.
Get Close Whenever Possible: When it comes to shooting underwater subjects, fill the frame whenever possible. Shooting close and wide will allow you to capture your subject in a more intimate manner and having less water between the subject and camera. Many professional photographers recommend no more than three feet of water between the subject and the lens. This technique will also help your colors remain more vivid and textures more defined.
Patience over the Chase: Patience is a necessity when it comes to doing anything underwater, and it’s even more critical when you’re on the hunt for close-up shots of clownfish. Many novice photographers make the mistake of chasing after fish in an effort to grab a shot before returning to the surface. This method is highly ineffective as the fish are always faster. Patiently waiting for sea life to return may be a challenge but it is the best way to get the image you’ve imagined. There’s a difference between swimming towards a shot and hunting down your subject.
You’ll also need to make sure your dive buddy understands and is willing to be patient as well; the last thing you need is a frustrated dive partner swimming about and kicking up sand when you’re in the mode to wait it out for the shot. Make sure you’re on the same page when working on your initial dive plan so there are no misunderstandings.
Know Your Controls: Experienced divers realize that many of their actions must be instinctive as visibility is limited; they must be able to complete several tasks intuitively. This concept also extends to your camera controls. Make sure that you know where key controls are without having to hunt and double-check as you may end up missing a shot when fiddling with your camera. When shooting underwater, you’ll only need to adjust focus, exposure and your strobe settings. Don’t worry about anything else as you’ll also be managing maintaining neutral buoyancy and composing your shot. Everything else is just a distraction at this point.
If there’s one thing that is similar with both land and aquatic photography, it’s the importance of mastering the basics. You’ll find that your aquatic photography skills improve quickly if you’ve paid ample attention to your foundation.
Straps for Safety: Your camera strap is the first line of defense between your expensive gear and the pavement. Make sure your current strap is in good order and free from fraying and malfunction. We’ve got several high quality straps to help your camera stay secure and in your control.
Keeping it All Together: Professional photographers know that the ability to keep all their gear together and quickly accessible is critical to executing a successful event. One of the most useful tools for working photographers is also one of the most overlooked—the photojournalist vest. The PROMASTER Photographers Shooting Vest has 21 pockets, ranging in size from pen-sized to oversize. The vented back and mesh liner allow free movement of air around the body. The snap epaulets will keep your camera, binoculars, or tote bag straps on your shoulder. The vest includes a heavy-duty zipper that will close the entire front or any portion you wish. It also has a single snap closure for the front and two snap adjustments for the sides. And, our PROMASTER Photographers Shooting Vest is built oversized to accommodate fully-filled pockets.
What is Fast Glass? You may hear photographers tossing around the term ‘fast glass’ but aren’t sure what it means. The term ‘fast’ refers to a wider aperture, which lets in more light and because less light is needed, the shutter doesn’t need to be open as long.
WANTED!!!!

Sunday, July 18, 2010
Rental
- Weekend rate starts at 4:00 p.m. on Friday and ends the following Monday at 11:00 a.m.
- Pick-ups any time between 2:00 p.m. and 4:00 p.m. will be charged an additional half-day fee.
- Any items picked up before 2:00 p.m. will be charge an additional full day.
TERMS AND CONDITIONS
Our Supply of equipment available for rental is limited. We advise you to call and make your reservations today!
CAMERA BODIES

- Canon EOS 5D Mark II Body . . . . . . . . . . . . . . . . . $125
- Canon EOS 50D Body . . . . . . . . . . . . . . . . . . . . . . $80
- Canon EOS 7D Body. . . . . . . . . . . . . . . . . . . . . . . $100
- Canon EOS Rebel T1i Body + 18-55mm IS. . . . . $70
- Canon EOS Rebel T2i Body + 18-55mm IS. . . . . $70
- Nikon D700 Body . . . . . . . . . . . . . . . . . . . . . . . . $150
- Nikon D300s Body . . . . . . . . . . . . . . . . . . . . . . . $100
- Nikon D90 Body . . . . . . . . . . . . . . . . . . . . . . . . . .$70
- Nikon D5000 Body + 18-55mm VR . . . . . . . . .$60
- Nikon D3000 Body + 18-55mm VR . . . . . . . . . $50
LENSES

CANON FIXED FOCAL LENGTHS
- Canon EF 28mm f/1.8 . . . . . . . . . . . . . . . . . . . . . $20
- Canon EF 50mm f/1.2 L . . . . . . . . . . . . . . . . . . . $50
- Canon EF 50mm f/1.4 . . . . . . . . . . . . . . . . . . . . . .$20
- Canon EF-S 60mm f/2.8 Macro . . . . . . . . . . . . . $25
- Canon EF 85mm f/1.2L . . . . . . . . . . . . . . . . . . . . .$50
- Canon EF 85mm f/1.8 . . . . . . . . . . . . . . . . . . . . . .$20
- Canon EF 100mm f/2.8 Macro USM . . . . . . . . . . . . . $20
- Canon EF 300mm f/2.8L IS USM . . . . . . . . . . . . . . . $75
- Canon EF 300mm f/2.8L USM . . . . . . . . . . . . . . . . . $50
- Canon EF-S 10-22mm f/3.5-4.5 USM . . . . . . . . . . . . $30
- Canon EF 16-35mm f/2.8L USM. . . . . . . . . . . . . . . .$40
- Canon EF 17-40mm f/4L USM. . . . . . . . . . . . . . . . . $30
- Canon EF-S 17-55mm f/2.8 IS USM . . . . . . . . . . . .$40
- Canon EF 24-70mm f/2.8L USM . . . . . . . . . . . . . . . $40
- Canon EF 24-105mm f/4L IS USM. . . . . . . . . . . . . . .$40
- Canon EF 28-135mm f/3.5-5.6 IS USM . . . . . . . . . . .$20
- Canon EF 70-200mm f/2.8L IS USM . . . . . . . . . . . . . $40
- Canon EF 70-300mm f/4-5.6 IS USM . . . . . . . . . . . . . $30
- Canon EF 100-400mm f/4.5-5.6L IS USM . . . . . . . . . .$40
- Sigma AF 15mm f/2.8 Fisheye . . . . . . . . . . . . . . . . $15
- Tamron AF 28-300mm f/3.5-6.3 XR Di LD x. . . . . . . . $25
- Tokina AF 10-17mm f/3.5-4.5 DX Fisheye . . . . . . . . .$20
- Canon Teleconverter 1.4x . . . . . . . . . . . . . . . . . . . . . . . $15
- Nikon AF 10.5 f2.8G ED DX Fisheye . . . . . . . . . . . . . .$25
- Nikon AF 50mm f/1.4 . . . . . . . . . . . . . . . . . . . . . .$15
- Nikon AF-S 50mm f/1.4G. . . . . . . . . . . . . . . . . . . $25
- Nikon AF 60mm f/2.8G ED Micro . . . . . . . . . . . . . . .$20
- Nikon-AF 85mm f/1.8D . . . . . . . . . . . . . . . . . . . . . $20
- Nikon-AF-S II 300mm f/2.8G ED . . . . . . . . . . . . . . . .$75
- Nikon AF-S 12-24mm f/4G ED-IF DX . . . . . . . . . . . . .$30
- Nikon AF-S 17-55mm f?28G ED-IF DX . . . . . . . . . . . . $40
- Nikon-AF-S 18-200mm f/3.5-5.6 VR . . . . . . . . . . . . .$25
- Nikon-AF-S 24-70mm f/2.8D ED-IF . . . . . . . . . . . . . .$40
- Nikon AF 24-120mm f3.5-5.6G . . . . . . . . . . . . . . . . . . $20
- Nikon AF 70-200mm f/2.8G ED-IF VR . . . . . . . . . . . .$40
- Tokina AF 10-17mm f/3.5-4.5 DX Fisheye . . . . . . . . . . $25
- Nikon TC-14E II-1.4x Teleconverter . . . . . . . . . . . . . . . $15
- Nikon TC-20E II-2.0x Teleconverter . . . . . . . . . . . . . . . $15
FLASHES AND EXTERNAL BATTERIES
- Canon 580EX II Speedlite . . . . . . . . . . . . . . . . . . . . . . .$15
- Canon 430EX II Speedlite . . . . . . . . . . . . . . . . . . . . . . .$15
- Canon ST-E2 Transmitter . . . . . . . . . . . . . . . . . . . . . . .$15
- Canon OC-E3 Off Camera Shoe Cord . . . . . . . . . . . . . . $5
- Nikon AS-15 Sync Terminal Adapter . . . . . . . . . . . . . . $3
- Nikon SB-600 AF Speedlight . . . . . . . . . . . . . . . . . . . . $15
- Nikon SB-900 AF Speedlight . . . . . . . . . . . . . . . . . . . . $15
- Nikon SC-29 TTL Coiled Remote Cord . . . . . . . . . . . . .$5
- Quantum Turbo 2x2 Battery . . . . . . . . . . . . . . . . . . .$15
- Quantum Turbo SC Battery . . . . . . . . . . . . . . . . . . . .$15
- Quantum Qflash T5d . . . . . . . . . . . . . . . . . . . . . . . . $20
- Quantum Turbo Cables. . . . . . . . . . . . . . . . . . . . . . $5
- Flash Braket. . . . . . . . . . . . . . . . . . . . . . . . . . . . . .$10
TRIPODS
- Bogen Tripod and Head . . . . . . . . . . . . . . . . . . . . . . .$15
- Bogen Monopod . . . . . . . . . . . . . . . . . . . . . . . . . . . . .$5
LIGHTING
- Elinchrome 400BX Set . . . . . . . . . . . . . . . . . . . . . . . . $50
- PocketWizard Plus II Transceiver Set . . . . . . . . . . . . . .$15
STUDIO ACCESSORIES
- 25lb Sand Bag . . . . . . . . . . . . . . . . . . . . . . . . . . . . . $5
- 15lb Sand Bag. . . . . . . . . . . . . . . . . . . . . . . . . . . . . $5
- 42in 5 in 1 Reflector Set . . . . . . . . . . . . . . . . . . . . . . $5
- Background Stand Set (stands & Crossbar) . . . . . . . . . $15
- 10x24 ft Backgrounds (Various Colors) . . . . . . . $25
DIGITAL PROJECTORS AND SCREENS
- LCD Projector . . . . . . . . . . . . . . . . . . . . . . . . . . . . . .$100
- 70x70 Dalite Projector Screen . . . . . . . .Free with Projector
Thursday, June 3, 2010
An Introduction to Aquatic Photography: Part I—Getting Scuba Certified
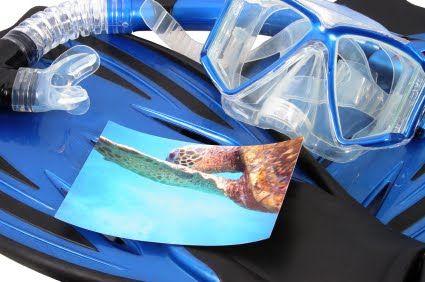
This summer we’re providing a three part series that will cover a number of aspects of underwater photography. Whether you just want to get better underwater shots of your kids in the pool, expand your abilities when snorkeling or become scuba certified in order to shoot fantastic tropical fish and reefs, we’ll explain how to make the most of every situation. In Part I, we’ll cover how to choose the right scuba instructor and dive shop in order to get certification, allowing you the opportunity to begin your underwater photography safari.
Scuba-diving is a sport that conjures up ideas of adventure and treasure-hunting. What many people don’t realize is that it’s also a sport that can be done regardless of being 21 or 61, and for those who’ve always wondered what it would be like to shoot underwater, getting scuba certified is an important required step in reaching that goal.
Scuba-diving can be a bit perplexing because, unlike other sports, there really isn’t a way to dabble in it to see if you like it. But there are ways to decide if this is something you’d like to pursue. If you’re intrigued or interested, here are a few tidbits to help you get started:
Find a Reputable Dive Shop: Get started by doing an online search to find a few dive shops or instructors in your area. Ask about the possible options for courses and the time and equipment commitment needed to get started. Also ask about their certification—the best-known associations are PADI (Professional Association of Diving Instructors) and NAUI (National Association of Underwater Instructors). Inquire about the qualifications of their instructors and about their safety record. And ask what kind of money-back guarantee they have in case an emergency comes up and you’re unable to go through with the entire course.
Don’t Be Shy: If you have any questions, please ask them. Many people who worry they may not be able to learn to scuba-dive are pleased to find once they begin that they’ve discovered a passion for a new sport. There are a few considerations to ponder. For example, if you’re age 40 or over, you’ll need to have a physical first to ensure good health, and those with specific respiratory issues such as asthma will need to first check with their primary physician before continuing.
Get a Buddy: Scuba-diving is considered a social sport and having a friend with you in the class can help in a number of ways. You’ll learn various skills that require two people and you’ll also need a dive buddy whenever you go out after certification, so why not find a friend to join you? If you’re unable to find someone to take the course with you, the instructor will pair you up with someone, giving you an opportunity to make a new friend or two!
Find the Right Fit: Your relationship with your scuba instructor is very important so make sure you find someone with whom you feel comfortable learning. If you find that you’re having trouble relating to an instructor, politely inquire about other classes or options. Professional instructors shouldn’t be offended as they understand that there are some situations where a different instructor is a better fit for a particular client.
It’s important to note that the quality of the photographs you shoot will depend largely upon your skills underwater and how well you handle issues of mastering neutral buoyancy and related diving skills. Once you’ve received your scuba certification, you’ll then be in a position to begin your underwater photography adventures and can even enroll in an underwater photography course.